Radar Mobile App Guide
The BlackBerry Radar Mobile App allows you to:
- locate your asset on the map;
- complete the module and accessory installation after they have been physically installed.
This guide provides detailed instructions and examples.
Downloading the Radar Mobile App
To download the Radar Mobile App
Asset Locator
You can locate any asset on the map using the Radar Mobile App. To use this feature, you need to make sure that:
- You have a user account on the Radar Dispatcher application. All user roles are authorized to use this feature.
- The asset you are locating is associated with a module.
To locate an asset,
-
Log in to the Radar Mobile App.
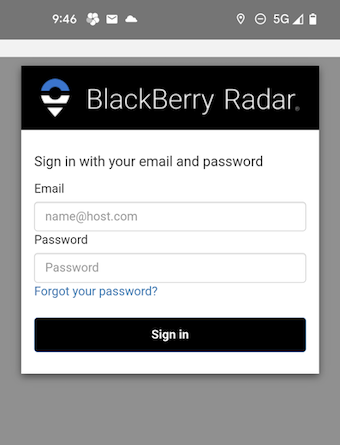
-
Click Asset Locator.
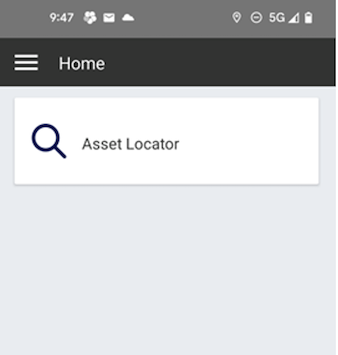
-
The Asset Locator page indicates your location with a blue dot.
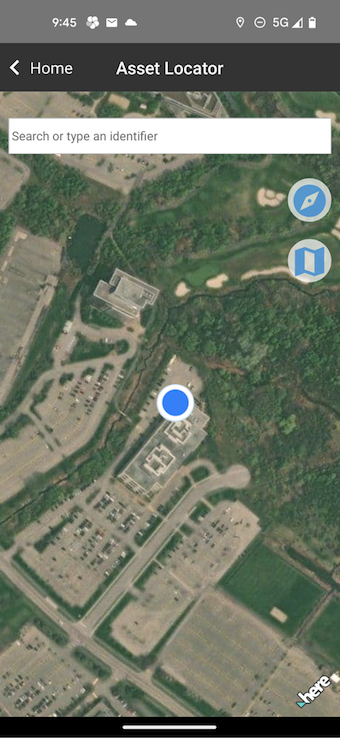
-
Enter the asset identifier in the search field. You can also enter the first or last few digits of the asset identifier and select from the list shown.
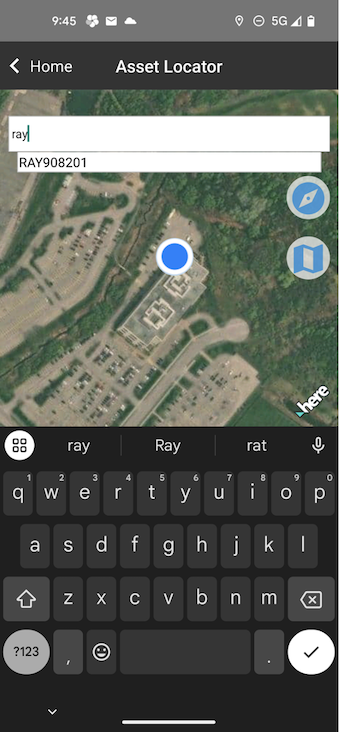
-
The asset located is shown on the map with an asset pin, along with details at the bottom of the page.
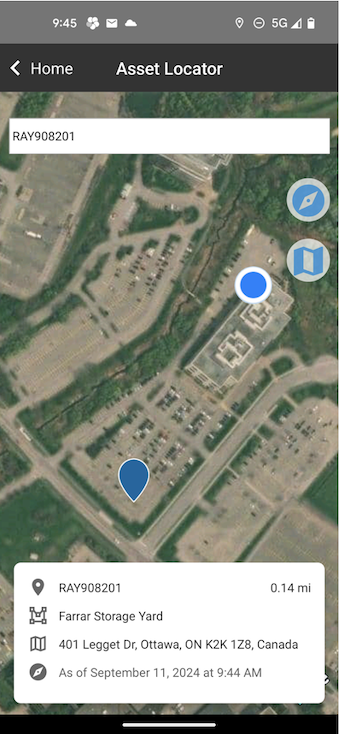
Note the two buttons at the upper right corner of the map:
- Compass button
 : Click to bring the location pins back into view.
 - When you search for an asset, the map will show both your location and the asset's location.
- If you move the map, you might lose sight of a location pin. Use this button to bring both pins into view.
- Map button
 : Click to toggle the map view between the satellite view and the road view.
Completing an installation
The New Installation page of the Radar Mobile App allows you to add the asset, module and accessory after the physical installation is complete. The validation and associations will be performed automatically when a new installation is submitted.
Prerequisites
Before you start, make sure you have:
- Internet access on your mobile device
- an Installer account on the Radar application
- the modules and accessories (if applicable) ready for scanning, or their serial numbers
- for trucking assets, the mounting location of each module and accessory
- for railcar assets, the position name of each module and accessory
Completing an installation
The app will guide you through adding an asset, an installed module, and if applicable, installed accessories. The app will use the information you provide to create the required asset-module-accessory associations. This section includes the following examples:
- Example 1: railcar asset with Radar H2M IS and accessory
- Example 2: trailer asset with Radar H2 and accessory
- Review or edit an installation
Example 1: railcar asset with Radar H2M IS and accessory
-
Sign in to BlackBerry Radar.

-
Click New Installation.

-
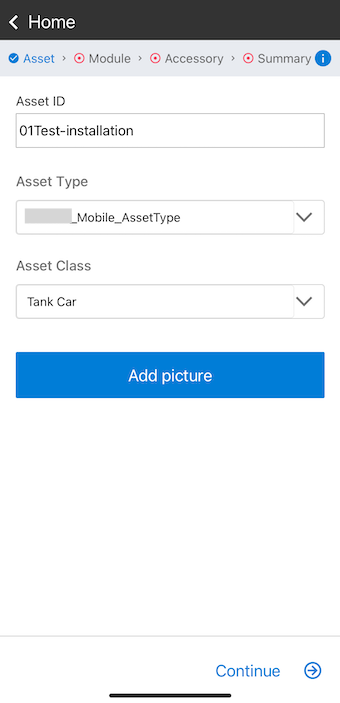
In the Asset screen,
- Enter the asset ID. You can enter any part of the asset ID, for example, the last four digits, to narrow down and then select from the list.
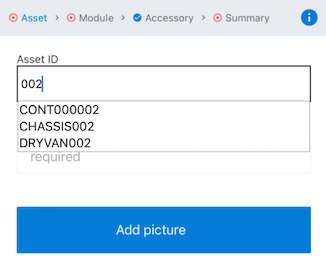
- Select Asset Type and Asset Class from the dropdown menus.
- Click Add Picture to upload a picture of the asset.
- Click CONTINUE.
-
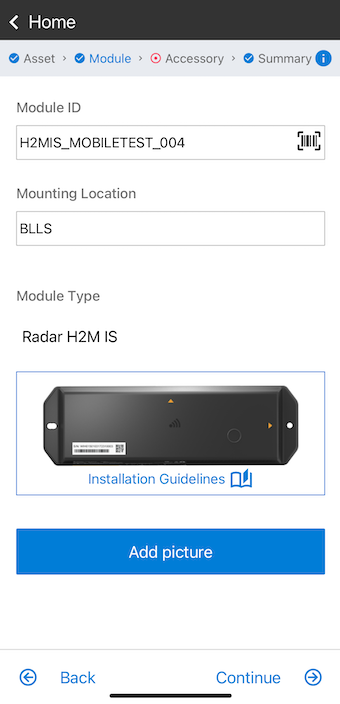
In the Module screen,
- Enter the module ID; as with the asset ID, you can enter any part of the ID to narrow down the list. Alternatively, you can also scan the barcode on the module using the barcode button.
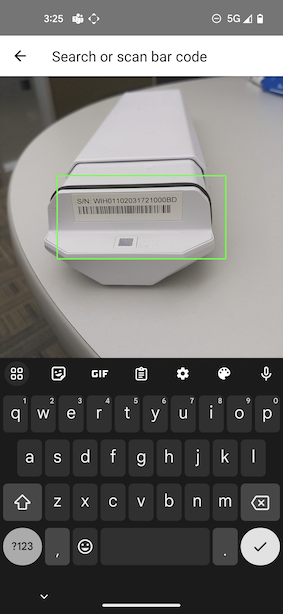
- In the Mounting Location dropdown menu, select the module "Position" that you have recorded. Positions proceeded with a "star" indicate preferred positions.
- Select Module Type from the dropdown menu.
- Click Installation Guidelines to see illustrated installation guidelines.
- Upload a picture of the module.
- Click CONTINUE.
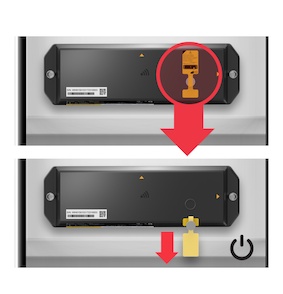
Note: Remove the magnet tape from the H2M IS module to power on the module.
-
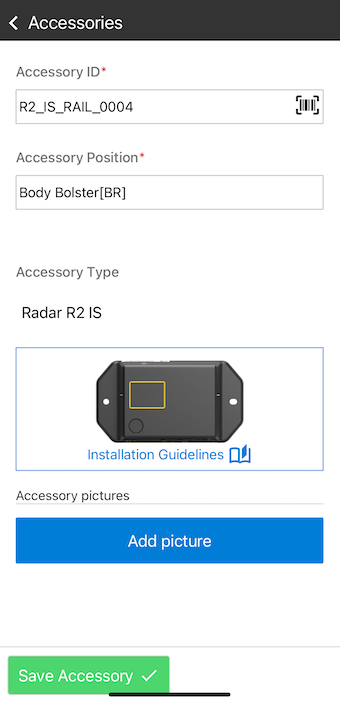
Click ADD ACCESSORY. In the Accessory screen,
- Enter the accessory ID; as with the module ID, you can enter any part of the ID to narrow down the list. Alternatively, you can also scan the barcode on the accessory using the barcode button.
- In the Accessory Position dropdown menu, select the accessory "Position" that you have recorded. Positions proceeded with a "star" indicate preferred positions.
- Select the accessory type from the dropdown menu.
- Click Installation Guidelines to see illustrated installation guidelines.
- Upload a picture of the accessory.
-
Click SAVE ACCESSORY.
- Repeat steps 5 and 6 to add another accessory, if needed.
-
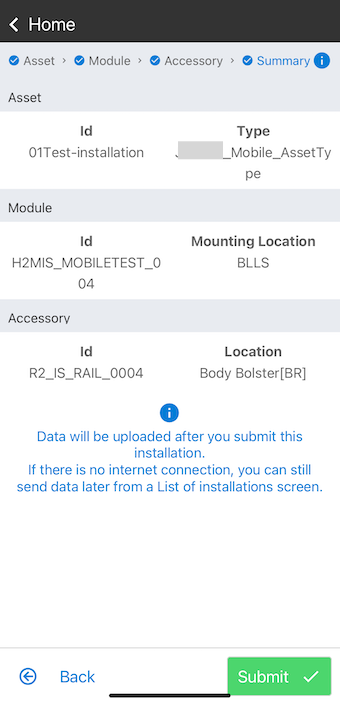
Click SUBMIT to complete this installation.
Example 2: trailer asset with Radar H2 and accessory
-
Sign in to BlackBerry Radar.

-
Click New Installation.

-
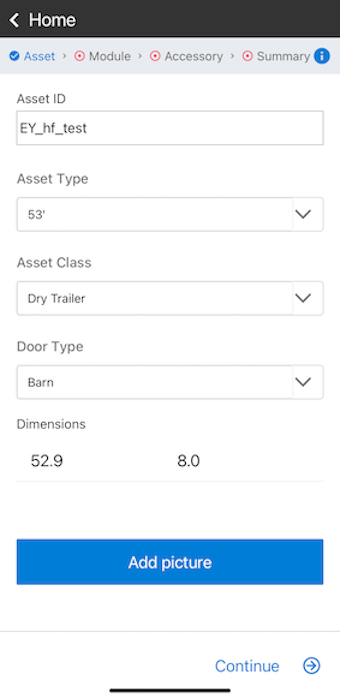
In the Asset screen,
- Enter the asset ID. You can enter any part of the asset ID, for example, the last four digits, to narrow down and then select from the list.

- Select Asset Type, Asset Class and Door Type from the dropdown menus.
- Upload a picture of the asset.
- Click CONTINUE.
-
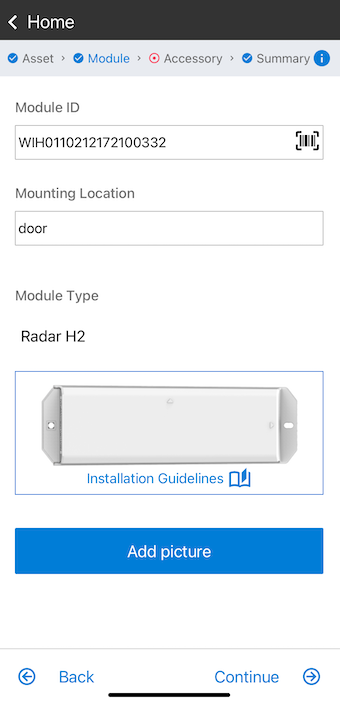
In the Module screen,
- Enter the module ID; as with the asset ID, you can enter any part of the ID to narrow down the list. Alternatively, you can also scan the barcode on the module using the barcode button.

- Select the Mounting Location and Module Type from the dropdown menus.
- Click Installation Guidelines to see illustrated installation guidelines.
- Upload a picture of the module.
- Click CONTINUE.
-
Click ADD ACCESSORY. If you have no accessories to add, click CONTINUE.
-
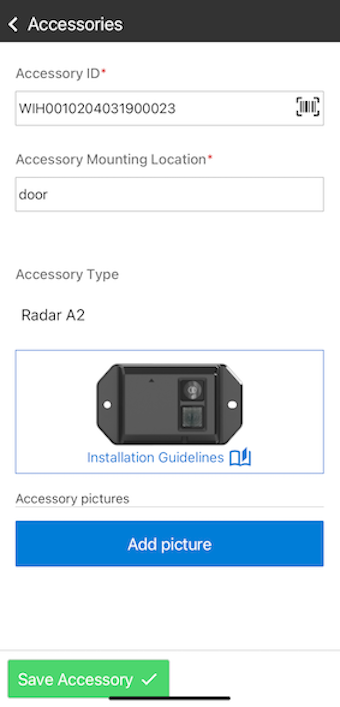
In the Accessory screen,
- Enter the accessory ID; as with the module ID, you can enter any part of the ID to narrow down the list. Alternatively, you can also scan the barcode on the accessory.
- Select the Accessory Location and Accessory Type from the dropdown menus.
- Click Installation Guidelines to see illustrated installation guidelines.
- Upload a picture.
-
Click SAVE ACCESSORY.
- Repeat steps 5 to 7 to add another accessory, if needed.
-
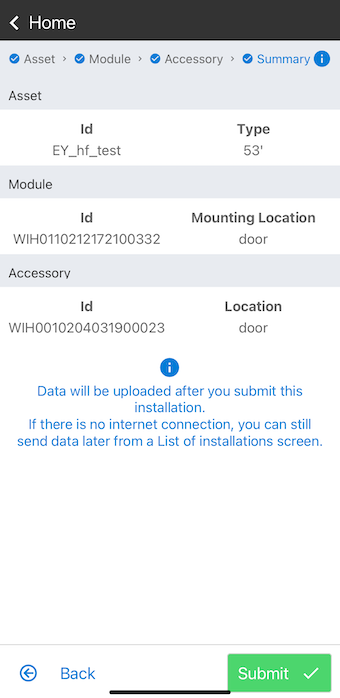
Click SUBMIT to complete this installation.
Review or edit an installation
-
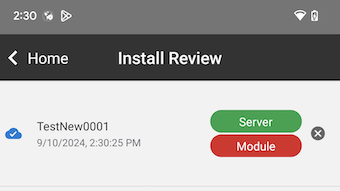
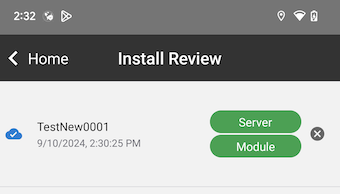
On the home page, click List of Installations. The status of the server, module and accessories is listed next to each installation. Note: The number of installations listed refers to installations performed on this device only.
- Server green: The app has sent the data to the Radar server.
- Server red: The app was unable to send the data to the Radar server.
- Module green: The module has reported data to the Radar server.
- Module red: The module has not yet reported data to the Radar server.
- Accessories green: Accessory data has been reported to the Radar server.
- Accessories red: Accessory data has not yet been reported to the Radar server.
-
Click an installation listed. If you want to make changes, click EDIT INSTALLATION at the bottom.
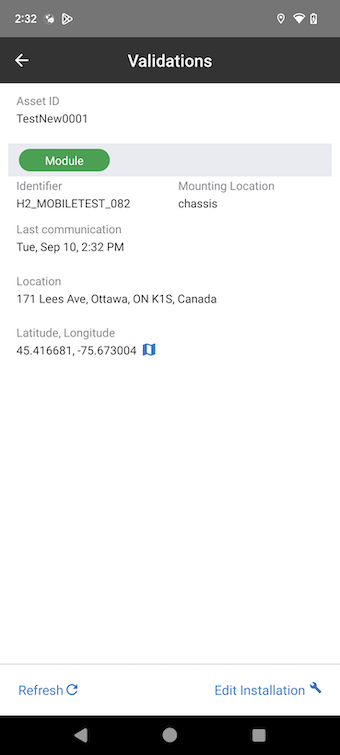
Note: Once the server status of an installation is green, you cannot change the asset identifier of that installation. An attempt to change the asset identifier at this point will be seen as an attempt to create a new installation with the currently associated module, and will, therefore, result in an error.
